Read on for application advice for spraying, brush and roller.
Always perform a test area
Before any application, we suggest you do a test area. When we advise to do a test area before full application, we are suggesting that you choose a smaller, inconspicuous area of your project to test the application and performance of the product, and to check compatibility of the product with the substrate it is being applied to. You can also go one step further and do a technical adhesion test, to see if the product has cured and adhered effectively. This should be performed after the recommended dry and cure time of the product. Please read on for more advice on how to perform the technical adhesion test.
To check adhesion to the substrate, apply a coat of Polyvine Varnish to a pre-prepared area. Allow the varnish to cure for 3 days then scratch the varnish surface gently with a coin. If the Polyvine Varnish remains firmly adhered to the surface, the adhesion is satisfactory and the main application can begin.
How to spray water based finishes
How to spray water based finishes.
Polyvine water-based varnishes can be sprayed through compressed air, HVLP and airless spray units.
HVLP is recommended by Polyvine for easy application and very little overspray.Spray unit and Tip Size
Water-Based Stains Tip Size 1.1 mm 0.043” 30 psi Max psi into gun
Water-Based Varnish Tip Size 1.3 mm 0.051” 30 psi Max psi into gun
SURFACE PREPARATION:
All surfaces should be clean and free from dirt and oil, and sanded.
All Polyvine water-based topcoats and wood stains are ready to spray from the container without additives. Always strain material through a medium to fine mesh filter before spraying. If necessary, viscosity can be reduced or open time extended in hot or dry climates, by adding up to 10% water.
Softwoods such as Pine absorb stain at an uneven rate and may respond better to staining if the wood is prewetted. Always test your colour on a hidden part of the furniture.
If you are using a sprayer that has been used for oil-based or lacquers, clean the unit thoroughly.
Apply a thin coat first that will dry and harden faster. Sand this first coat down to a smooth base on which to build your finish coats with a 220-320 grade foam sanding pad or #400-grit sandpaper. It is better to spray 2 thin coats rather than 1 heavy coat.
Break your work into sections such as dresser top or drawer fronts. Spraying too large of an area can result in a textured grainy surface. A correctly sprayed finish should appear even and glossy. It is important to spray enough material to allow proper flow and levelling of the finish.
Spray medium wet films at 3-5 wet ml thickness. Practice makes perfect. If you have never sprayed finishes before, take a large piece of cardboard and practice your technique first.
Spray water on the cardboard to learn how the gun works. Check your fluid settings and adjust the controls to get comfortable with the spray angles and to develop your technique.
SPRAYING TOPCOATS:
Keep your gun at a 90* angle, 6-8″ from the surface. On large flat areas, use wet, even patterns 6 -8″ wide. For narrow surfaces, reduce the fan pattern to 2-3″ to reduce overspray.
For topcoats, overlap each pass 25% to conceal lines.
SPRAYING WATER BASED WOOD STAINS:
Keep your gun at a 90* angle, 6-8″ from the surface. On large flat areas, use wet, even patterns 6 to 8 wide. For narrow surfaces, reduce the fan pattern to 2-3″ to reduce overspray. Overlap each pass of stain 50% for even coverage and wipe back the excess with an absorbent cloth. For narrow surfaces, reduce the fan pattern to 2-3″ to reduce overspray.
What is HVLP?
HVLP stands for “high volume low pressure”, which means a “high air volume, low pressure” . HVLP paint spray systems are a great solution if you want to achieve a fine and even spray pattern with low spray mist. How does spraying with HVLP work?
The air flow generated by the turbine moves into the container and to the gun nozzle.
The air flowing into the paint container compresses the air in the container and pushes the paint through the suction tube, towards the nozzle.
With the help of the high air volume and the low air pressure, the paint is atomised into the finest paint particles at the nozzle outlet. This is how the actual spray jet is created.
Since both paint particles and an air stream are conveyed through the nozzle, the paint particles remain enveloped by the air stream as if by an air jacket. This helps to minimise the spray mist and ensure a higher material transfer. Accordingly, the biggest advantages for the user is better coverage and less material loss.
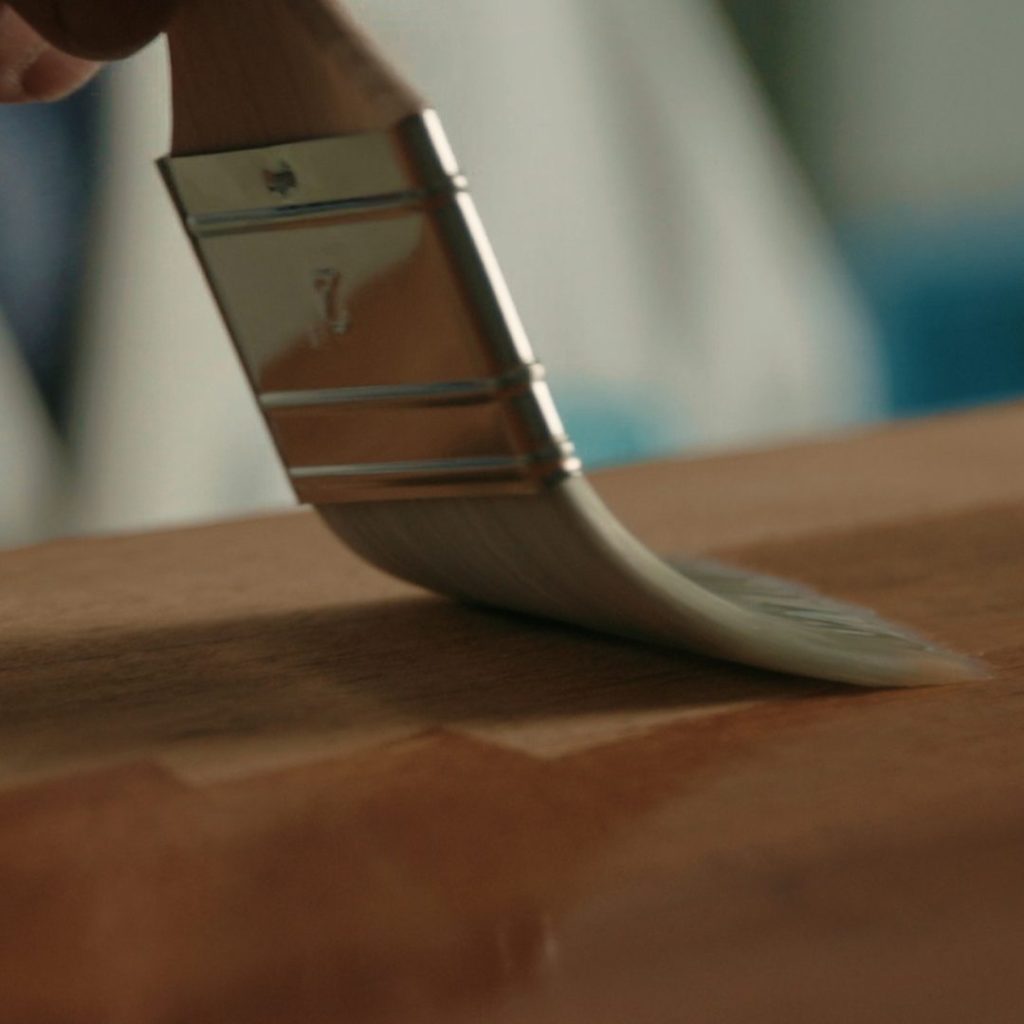
Varnish application using a brush
Varnish application using a brush
A thin varnish brush with fine synthetic bristles works best with water-based varnish. Applying the material in thin coats prevents pooling and bubbling, but there should be enough material to flow out so that brushstrokes disappear. The brush should always move in the direction of the grain, and the stroke should begin on an unvarnished part of the surface and end on a wet area. Long, straight strokes are better than short, arched ones. If the material foams or bubbles, brush out the bubbles and spread the varnish so that they don’t reappear. Penetration may be uneven, so avoid leaving with insufficient coverage.
Do not shake water-based varnish containers as this will generate bubbles which will produce bad results.
Rehearse your finishing sequence to allow handling of a piece in process and to ensure that the most visual surfaces (usually the top and front) are left for last to ensure maximum attention. In general, begin with the interior or bottom of a project, orienting the surface at hand horizontally whenever possible to allow the finish to level out. Then move to the less evident exterior surfaces, such as the sides of a cabinet. Work discrete sections one at a time, such as a panel face. Leave the top surface of a project for last to ensure the best levelling as the unit sits and dries.
In the case of complex surfaces such as frame-and-panel assemblies, brush the interior edges of the frame first, moving outward to the flat areas. There are no hard and fast rules to finishing sequence. Just calculate the approach as best you can for each project.
Before varnishing, prime the brush bristles by immersing them in water, and then shake off the excess. Priming conditions the bristles for work and eases brush cleanup.
Take care in warm conditions, water based varnish dries very quickly and you can lose your wet edge.
Whenever water or any stain or finish that contains water comes into contact with wood, it causes the wood fibres to swell, which is called “grain raising” or “raised grain.” After the water has dried the wood feels rough to the touch, and thinly applied finishes also feel rough. Raised grain occurs no matter how fine you sand the wood before wetting it. Because you can’t prevent raised grain if you use a water-based product, you need to deal with it so the final finish comes out smooth. Dampening the surface with a mist of water or a damp cloth, allowing it to dry and re-sanding will generally overcome this.
Once sanded smooth, the grain won’t raise again nearly as much as it did with the first wetting.
When applying water-based varnish with a brush, it is important to prepare the surface first. Make sure that the surface to be covered is clean and free of dirt, dust or anything that might prevent the varnish from bonding to the surface.
You can do this by removing any dirt or debris with a brush or vacuum. Then lightly sand the surface with fine-grit sandpaper to create a smooth finish.
After that, wipe the surface down with a damp cloth to remove the dust particles. Once the surface is clean, you can begin to apply the water-based varnish.
Always test on surfaces before application to ensure compatibility.
How do you keep brush marks from water-based varnish?
The key to preventing brush marks when applying a water-based varnish finish is to use the right brush and work in controlled strokes.
When selecting a brush, use a synthetic brush with fine, soft bristles. Dip the brush in the varnish and gently tap the sides to remove excess material. To apply the varnish, use a very light touch and work in slow controlled strokes along the direction of the grain in the wood. This will help ensure uniform coverage. Avoid back-brushing, or running the brush bristles over areas that have already been applied, as this can cause unwanted brush marks. When applying successive coats, be sure to feather the edges between new and old layers to create a smooth, uniform coat.
Allow each coat to completely dry before starting the next. Finally, be sure to clean the brush thoroughly with water and soap and then thoroughly rinse the brush with warm soapy water. This will help to avoid brush marks and streaks caused by the buildup of varnish on the brush. Water based varnish dries very quickly, do not leave wet brushes for more than a few minutes or dry varnish will build up in the stock.
If you feel any stiffness in the brush, clean with Polyvine varnish and paint remover.
Stir varnish well; never shake it. Shaking can introduce bubbles, Pour the amount you think you’ll need for the first coat into a separate, clean container.
Dip the brush into the varnish, loading it with an amount appropriate to the surface at hand. For example, to prevent runs and drips, just dip the tip when brushing edges. When coating broad surfaces, load enough for efficient transfer without dipping the bristles more than half of their length.
Begin with the edges because any spill over is easily cleaned up afterward. When varnishing an edge, orient the project with the less evident face downward, and angle the brush slightly so that one of its chiselled edges is doing the work. First brush outward toward a nearby corner, and then in the opposite direction to the other corner. Wipe away any drips.
If the adjacent panel face hasn’t been varnished yet, it’s easy to wipe away any drips with a rag wrapped tightly around your finger.
Wrap a clean rag tightly around your finger, and lightly drag it along the underside of the edge to thoroughly wipe away drips. If the faces are already finished, use a very lightly loaded brush to spread out any runs.
Avoid drips by brushing outward from the edge of a surface, never inward against it.
To varnish broad surfaces, begin at one edge of the panel, and work in a series of wide, continuous, overlapping sections. Starting a few inches in from one end, pull the brush smoothly across the wood.
Next, working backward from your previous starting point, complete the section by moving in the opposite direction. Move slowly enough to allow the finish to flow from the bristles, but quickly enough to avoid puddles. As you progress, gradually increase the bristle angle to encourage the finish to flow out. As you complete the section pull the brush straight off the end of the panel to prevent the bristles from crawling down the edge. Apply each subsequent strip of varnish in the same manner, slightly overlapping the previous one.
In spite of careful work, some dripping and sagging are inevitable. Fix these areas after the coat of varnish has dried, removing drips by slicing them away with a very sharp chisel.
Whenever water or any stain or finish that contains water comes into contact with wood, it causes the wood fibres to swell, which is called “grain raising” or “raised grain.” After the water has dried the wood feels rough to the touch, and thinly applied finishes also feel rough. Raised grain occurs no matter how fine you sand the wood before wetting it. Because you can’t prevent raised grain if you use a water-based product, you need to deal with it so the final finish comes out smooth. Dampening the surface with a mist of water or a damp cloth, allowing it to dry and re-sanding will generally overcome this.
Once sanded smooth, the grain won’t raise again nearly as much as it did with the first wetting.
When applying water-based varnish with a roller, it is important to prep the surface first. Make sure that the surface to be covered is clean and free of dirt, dust or anything that might prevent the varnish from bonding to the surface.
You can do this by removing any dirt or debris with a brush or vacuum. Then lightly sand the surface with fine-grit sandpaper to create a smooth finish.
After that, wipe the surface down with a damp cloth to remove the dust particles. Once the surface is clean, you can begin to apply the water-based varnish
Always test on surfaces before application to ensure compatibility.
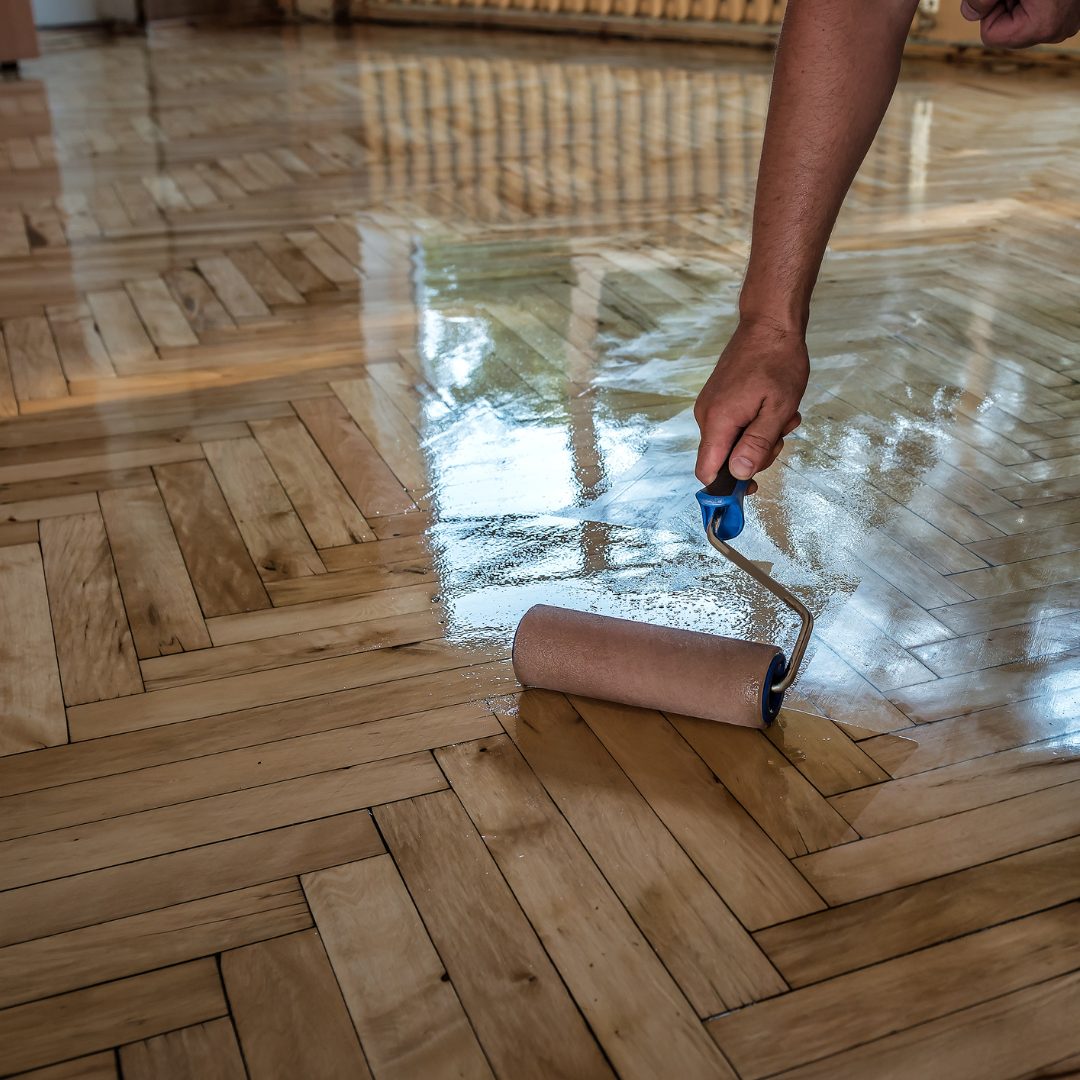
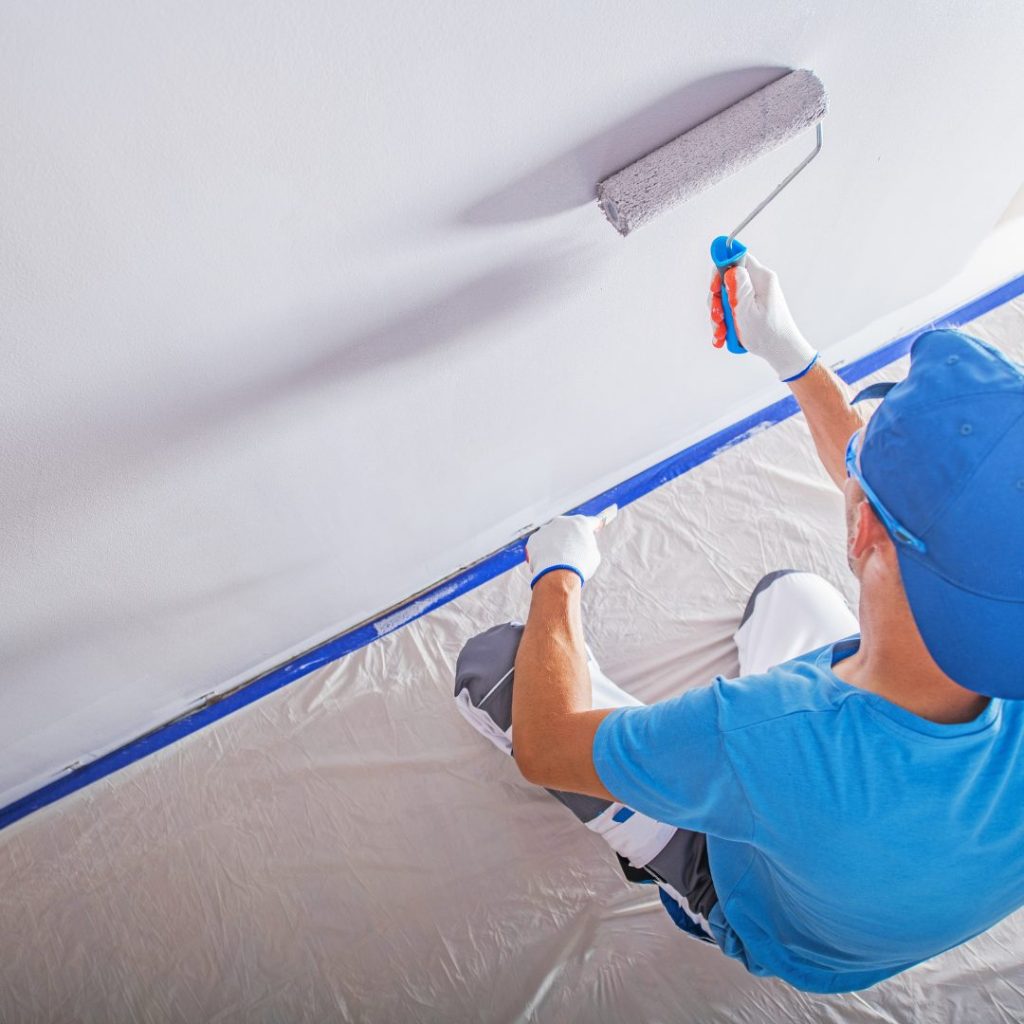
Walls and floors
If using a roller, you need to use an extension pole to reach across the floor and higher wall
areas and a roller tray to hold the varnish
Start in a corner, approximately 3-4 feet away, and then quickly and evenly roll out the varnish
using criss-cross strokes.
Move in one direction across the surface, turning the roller at the end of each stroke for a consistent finish. If your strokes become uneven, use a brush or foam brush to enhance and even out the surface. Do not apply pressure to the roller, this will cause uneven film and maybe produce bubbles in the varnish.
Repeat this process until you have covered the entire surface.
Allow the varnish to dry for 2-4 hours before adding a second coat. Make sure to go back with a damp cloth to remove any dust or debris from the surface before the next coat. After the second coat is dry, you have successfully applied water-based varnish to your surface with a roller.
Ideal application temperature 15-20C.
Water based varnishes dry very fast as the temperature rises and you can lose your wet edge,
(if the varnish edge dries during application, you will produce overlap marks).
When applying the varnish, start with a light coat and let it dry completely before applying another. Most water-based varnishes need to cure for 24 hours before light use, acrylics 5-7days before hard use, and heavy duty varnish just 16 hours.
Don’t over-apply the varnish, as it can run or leave streaks. Once you’re finished, you may needt o lightly sand the surface with a fine-grit sandpaper.
Afterward, you can buff the surface to achieve a smooth, even finish.
When rolling varnish, be sure to use slow, steady strokes and a good technique to ensure a uniform finish.
Whether brushing or rolling, the goal should be the same: evenly spread and evenly consolidate the varnish for a consistent finish. Experiment and find what works best for each specific roject.
Make sure that the roller is specifically for use with water-based products. It is important to avoid using a high-pile roller, as it can leave excess material on the surface and can cause air bubbles.
For a smooth finish with even coverage, use overlapping roller strokes and use a brush to manoeuvre around corners and details.
After the varnish is applied, it should be left to cure.
The Best Rollers for Water-Based Varnish
Water-based varnish is a popular choice for finishing wood surfaces and protecting other surfaces because it is durable, easy to apply, and dries quickly. However, choosing the right roller is crucial for getting a smooth, even finish.
Use for water-based varnish.
Polyvine recommend a Short Pile 5mm pile Gloss Roller


 Spray unit and Tip Size